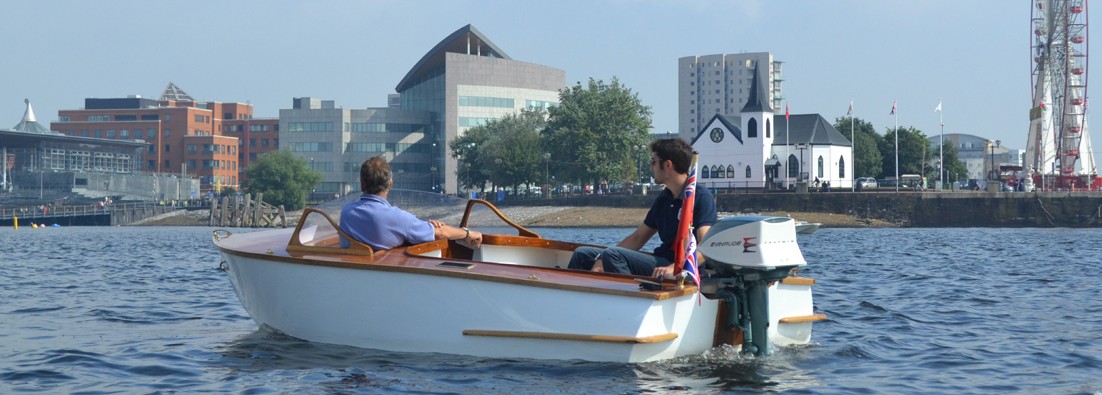

So the time came for me to bite the bullet and change over to remotes! After several long trips sat half twisted on my wooden seats, one hand constantly on the tiller, I’d had enough and said “that’s it I’m sitting up front from now on!”
Space is tight up front in the boat, so when it came to requirements for the steering wheel they were quite specific. After having cut 6 inches off the bottom of the dash to accommodate my lanky legs, sat in the new driving seat with a tape measure on my lap, I’d decided that a 14 inch wheel was what I needed. In my usual style I thought “ah I reckon I’ve got some bits of wood that I can use for that”, as I’m a bit of a hoarder when it comes to wood scraps!
Step 1 Moulding the spokes
I wanted to give the wheel a bit of a profile so it wasn’t completely flat, so I decided to make the spokes from laminated teak (another thing in abundance around my workshop) and set the wheel rim forward of the hub slightly. Firstly I made the form to laminate the layers using some old scrap ply.

Next I glued 7 layers of teak with west epoxy mixed with wood fibre, I used this as a glue throughout as this would need to be very strong.

The stock part for the spokes was made about 6 inches wide initially to give plenty of options for the spoke shapes later. I decided on two downward facing spokes with a slight taper on them, after googling “vintage steering wheel”.
Once I had moulded this piece I drew the spoke and hub shape on by starting with the centre, then marking 8 inches either side. This would give me the right size for a 14 inch wheel plus an inch of scrap either side to trim off after, just to make sure. I then cut the shape out with a jigsaw and drilled a quarter inch hole in the middle so I had a good centre to work from.

Step 2 Making the stock for the rim
I cut some bits of oak on the chop saw which would form a shape with 12 segments (I’m not sure what that’s technically called?). I had no idea how to work out what size the segments had to be to achieve a 14 inch diameter so it was purely trial and error, cutting bits until they started to form the right radius. At this point the pieces were about 2 inches wide to give plenty of room to play with, after all 80% of it was going to be cut away when it’s rounded off so this didn’t matter. I then clamped the whole thing up using a band clamp to make sure it fitted together, this took several attempts as each segment needs to be spot on or else some of the joints will open up in the throat and weaken the whole thing.

Next was to fit the spokes to the rim. With the rim clamped into shape (but not glued) I laid it face down on the bench and placed the spokes on top. With it all lined up I drew round the spokes and cut out the channels to set them in to the rim.

I did this again with the chop saw but this time set a depth stop to cut the majority of the wood out and finished it off with a chisel. This was cut very fine so that I had to press the spokes on to the segments in the vice, again done with strength in mind. When I was happy that all the joints were tight and flush I glued and clamped up the whole thing.

Step 3 Drawing and shaping the wheel
To get the shape of the wheel I began by drawing my 14 inch outside diameter. I did this by screwing the wheel down to the bench (using the hole I had already drilled in the middle) and drawing the outside circle using some dividers. I then drew the inside circle, coming in about an inch which was the same as the rim thickness giving me a square cross section. I then blended the inner circle into the spokes using my trusty paint pot drawing aid (responsible for many of the radiuses on the boat) to give a more “professional” shaped look to the wheel, as well as adding some strength to the area where the spokes meet the rim.

Next I cut it all down to roughly the right size, at this stage it all looked rather cumbersome and I still wasn’t sure how it would look or feel for that matter. But anyway out with the jigsaw and I began cutting it to shape, I did this just outside the lines with the plan to use the belt sander to slowly work down to the line afterwards, and take out any slip ups on the way. Now it was starting to resemble a wheel at last!

Step 4 Banding and the hub
I was thinking of ways to increase the strength of the wheel rim with metal and landed on the idea of running a band around the outer edge of it. This was going to be the easiest as I could form it round the wheel and then screw it on afterwards. I decided to set it into the wheel a bit so it didn’t protrude too much, so I cut a channel round the outside for the band to sit in; it was about 3mm thick brass so I wanted to set it in at least 2mm. I set the table saw so that 2mm of the blade was protruding and clamped two fences onto the saw bed to keep the wheel in the right place (side to side), then turned the wheel round a few times until I had an even depth channel all the way round the outside. I had to do this about 3 times in total, moving the fences each time to get a channel the right width for the brass strip. Eventually it was somewhere close and with a small bit of tidying up with a chisel it was ready.
Next I did a mock fitting of the band, clamping it in place with small g-clamps and bending it to fit the wheel. I also took this opportunity to mark the screw positions to hold it on, two per segment which coincidently were very easy to mark evenly all the way round because of the segments in the wooden part. Once they were all drilled I removed the band until the end.

I also needed a hub for the wheel to match the taper on my cable steering system. I had an old ships type wheel that my dad had given me which would become the donor. It was chrome plated brass so easily modified, I clamped it in the centre of the wheel and marked six screw positions by going diagonally between the segments on the wheel to mount it in the centre. Also with a quick sand I took it back to a brass finish… Many will cringe at that I know but it had to match the boat!

Step 5 The finishing touches
Then it all had a final shape, I put a small radius round all edges of the wheel to make it feel nicer in the hand. I did this with a router held upside down in a vice (ok a little dodgy I know), with a small radius guide bearing bit and ran the wheel through slowly. Next was a quick finish up and shape by hand with some 80 grit paper and a check to make sure it was a nice feel. Then came the varnish, I used Le Tonkinois, six coats in total with a quick rub down in between.

Lastly was the banding re-fit, I screwed it back on this time bedding it down with CT1 to add a bit of strength and stop any nasties getting under the brass.

When all was dry it had a quick going over with some brasso and it was ready to fit, thank god no more aching shoulders now I can relax up front. Best of all the only thing I had to buy for the wheel was some brass strip which was about £8… bargain wheel!